Winter brings more than just the holiday season for RV owners. It’s also time to winterize campers and RVs, a crucial step to protect your home-on-wheels from the harsh cold. The process involves preparing various parts of your vehicle, from the water system to the engine and fuel system, for the prolonged inactivity of winter.
Is winterizing an RV necessary? Absolutely! This is crucial to extend the lifespan of your RV and protect your investment. If left unchecked, winter weather can cause serious damage to your RV, from freezing pipes to damaged engines and interiors.
Why You Need to Winterize Your RV
Robert Walden, the gearhead behind Vehicle Freak, says a failure to properly winterize your RV can not only lead to an array of problems but ones that are costly to repair.
“One time I came across a beautiful vintage Airstream RV,” Walden said. “The owner, a friendly retiree, had forgotten to winterize it. Come spring, he found the RV’s plumbing system had burst due to water left in the pipes over the winter. Not only that but the repair costs were steep, and it was a situation he could have avoided with proper winterization.”
In this guide, we’ll walk you through each step of winterization, ensuring your camper is safeguarded against the frosty weather and ready to hit the road again when spring arrives. So, whether you’re new to the RV scene or an experienced road warrior, here’s how to winterize an RV.
- Winterize RV Water System
- Exterior and Interior RV Cleaning
- Clean Under RV Storage Compartments
- Clean Storage Compartments in RV
- Winterize RV Engine and Fuel System
- Winterize RV Tires and Brakes
- Winterize RV Propane System
- Winterize RV Battery
- Choosing a Place to Store Your RV Over Winter
- RV Winterization Checklist
Winterize RV Water System
When you winterize campers or RVs, a crucial step is to tackle the water system, as pipes and tanks are vulnerable to freezing temperatures. When water freezes, it expands, which causes pipes to crack and damage the system.
Gavin Dawson, a lead instructor with Global Emergency Medics, adds that “leaks, burst pipes, and cracked components can eventually fail to provide the needs of its occupants, not only leading to disrupted travel plans and considerable inconvenience but also putting the passengers’ health and well-being at risk.”
Here are the main steps for winterizing the water system:
- Drain all water from the system, including fresh water, gray water and black water tanks.
- Open all faucets and shower valves to ensure no water is trapped.
- Once drained, bypass the water heater to prevent antifreeze from filling it.
- Use a blowout plug to clear out any remaining water from the pipes using compressed air.
- Finally, add non-toxic RV antifreeze to the system. Run the water pump until you see the antifreeze coming out of all faucets.
Exterior and Interior RV Cleaning
Before you tuck your RV away for the winter, a thorough cleaning is in order, as food remnants can attract pests and create unpleasant odors over the months of storage.
- Start with a comprehensive wash to remove any dirt or road grime from the exterior.
- Don’t forget the roof, where debris often collects.
- After washing, apply a good quality wax to protect the paint and seal any minor scratches. Once inside, vacuum the floors and clean all surfaces.
- Empty and clean the refrigerator, leaving the door slightly open to prevent mold.
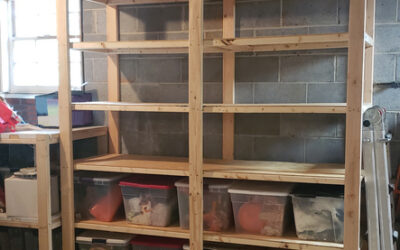
Clean Under RV Storage Compartments
These areas can often become a catch-all for dirt, grime and unwanted critters.
- Begin by removing all items from the storage compartments and use a vacuum to clean out any dirt or debris.
- Wipe down the compartments with mild detergent and warm water and then dry thoroughly to prevent mold or mildew.
- Check for any signs of pests and consider using critter repellents for added protection.
Clean Storage Compartments in RV
Interior storage spaces like cupboards, closets and drawers should also be thoroughly cleaned.
- Empty interior compartments completely, removing any items that could freeze or attract pests, such as food or liquids.
- Wipe down all surfaces with a gentle cleaning solution.
- Leave the doors open to air out and prevent stale odors.
Winterize RV Engine and Fuel System
Moving on to another critical component, let’s dive into the steps for winterizing an RV’s engine and fuel system. After all, winterizing an RV isn’t just about protecting the living quarters against harsh winter conditions. Here’s how to do that:
- Change the engine oil and filter. Fresh oil will reduce the risk of corrosion during the storage period.
- Top off your fuel tank. This helps prevent condensation from forming inside the tank.
- Add a fuel stabilizer. This keeps the fuel from breaking down over time, ensuring it’s ready to go when you are.
- Run the engine for a few minutes after adding the stabilizer, to distribute it through the system.
Note: If your RV includes a generator, you should follow these steps for its engine as well.
Winterize RV Tires and Brakes
Your RV’s tires and brakes are two components that can significantly degrade over a winter of inactivity if not properly cared for.
Tires:
- Inflate the tires to the maximum recommended pressure. This helps prevent flat spots from developing during long-term storage.
- Consider using tire covers to protect them from UV damage, especially if the RV will be stored outdoors.
Brakes:
- Check the brake fluid levels and top off if necessary. Moisture can seep into brake fluid over time, causing corrosion in the brake lines.
- If it’s been a while since you’ve changed your brake fluid, consider flushing the system.
Winterize RV Propane System
The propane system is a vital component in any RV, providing heat and fuel for cooking. However, during winterization, it’s essential to take some steps to ensure its safety:
- Turn off the propane. Start by closing the valve on your propane tank. This simple step can prevent a potential leak.
- Drain the lines. Run your propane appliances until they go out, indicating that the propane lines are empty. This helps to prevent potential freezing and cracking of the lines.
- Check for leaks. Even in the off-season, a small leak can become a big problem. Use a soapy water solution to check for leaks at the connections.
Winterize RV Battery
Your RV’s battery can take quite a beating during the winter months if it’s not adequately prepared. Here’s how to winterize your battery and ensure it has the power to start your RV when the snow melts:
- Disconnect it. If you’re storing your RV for an extended period, consider disconnecting the battery. This will prevent it from slowly draining over time.
- Check and clean terminals. Ensure that the battery terminals are free from corrosion. A solution of baking soda and water can be used to clean any corrosion that’s present.
- Charge it. A fully charged battery is less likely to freeze, so make sure your battery is fully charged before storing your RV.
By looking after your battery when you winterize an RV, you also ensure a smooth start to your next road trip.
Choosing a Place to Store Your RV Over Winter
Winterizing your RV isn’t just about the systems and components; it’s also about where you store it. Picking the right storage option can protect your investment and prolong its lifespan:
- An enclosed or covered space is ideal to protect your RV from the elements. If you must store your RV, use a high-quality cover for added protection.
- Access to electricity is also ideal. This allows you to use a dehumidifier or maintain your battery with a trickle charger, preventing mold and keeping your battery in good shape.
Choosing the right storage for your RV is a critical part of winterization. Check out our detailed guide on how to find the right storage facility for your RV. It will guide you through the whole process and help you make an informed decision.
If you need to rent a space for your RV, explore offerings on SpareFoot and find the right storage facility for your RV here.
RV Winterization Checklist
Winterizing can be an overwhelming task for new motorhome users and it can be easy to lose track of what needs to be done. So here’s a quick, straightforward checklist of steps for winterizing an RV:
- Water System: Drain all water from the system and add RV antifreeze.
- Exterior and Interior Cleaning: Clean the entire RV in and out, including the under-RV storage and the storage spaces inside.
- Engine and Fuel System: Add a fuel stabilizer to your fuel tank and run the engine to distribute it.
- Tires and Brakes: Inflate tires to the correct pressure and check the brakes.
- Propane System: Turn off the propane and drain the lines.
- Battery: Disconnect the battery, clean the terminals and ensure it’s fully charged.
- Interior and Exterior Storage: Choose the right storage option for your RV, considering location, amenities and indoor vs. outdoor storage.
Remember, these are the basic steps. Always consult your RV’s owner manual for specific instructions related to your model. Winterization is an important part of RV ownership, so take your time and do it right. Check this video resource for an easy step-by-step process for winterizing a travel trailer.
Get Your RV Winter Ready
Winterizing your RV isn’t a task to be taken lightly. It’s an essential part of ensuring your beloved mobile home is ready to hit the road again once the cold thaws.
“Because the cold can have detrimental effects on batteries, tires, and fuel systems, you’ll be glad to know that a bit of proactive care can make all the difference,” Walden said.
By following the above steps and advice, you can protect your investment and enjoy many more seasons of adventure.